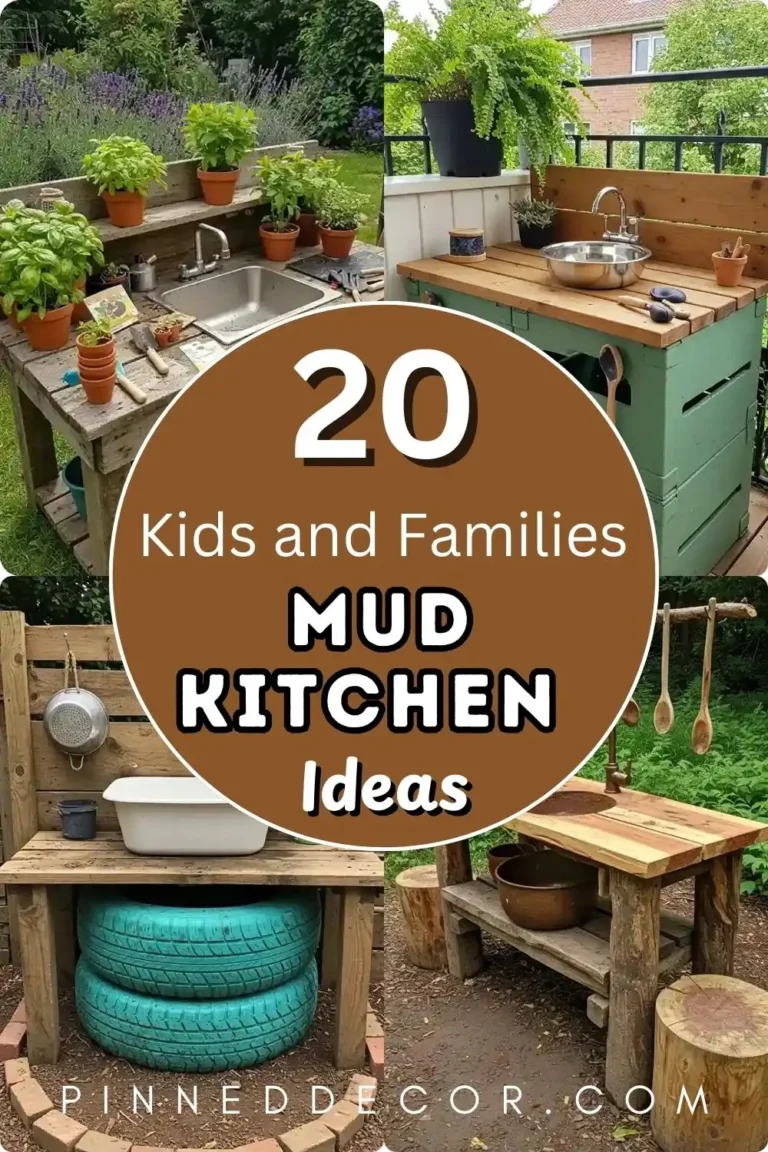
13 Creative DIY Mud Kitchen Ideas You Can Make at Home
This post will show you the best DIY Mud Kitchen Ideas.
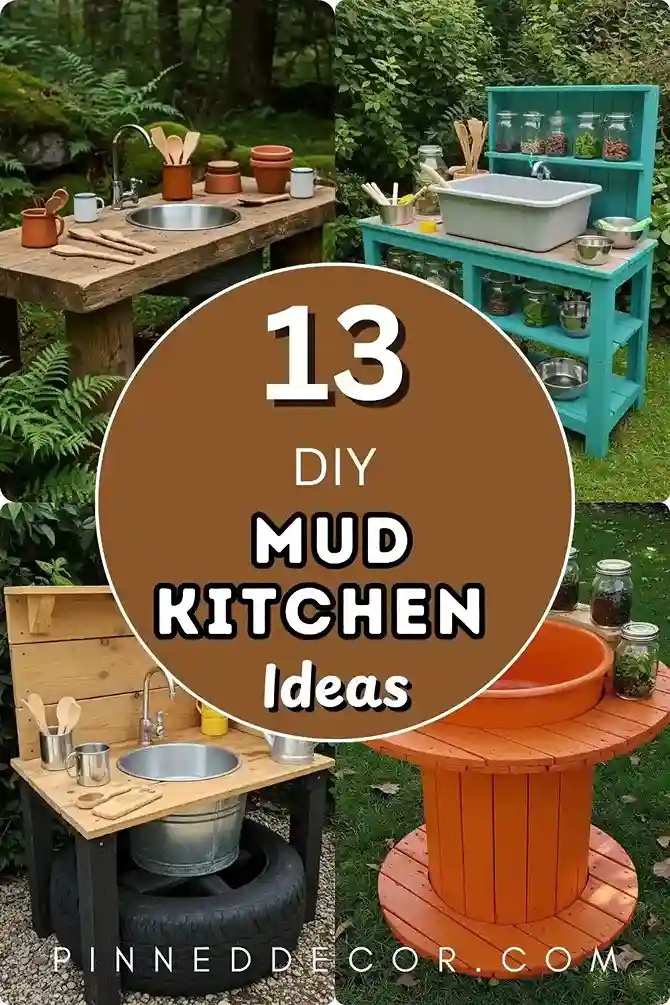
Diy mud kitchen ideas are magical, the spaces where kids can unleash their imagination, mixing dirt, water, and natural treasures to create pretend culinary masterpieces.
These outdoor play areas foster creativity, sensory exploration, and a deep connection to nature, all while keeping messes out of your home.
The best part? You don’t need a big budget or advanced skills to build one.
From repurposed furniture to simple wooden setups, mud kitchens can be crafted with everyday materials.
Why Mud Kitchens Are a Must-Have?
Kids thrive on messy play, and diy mud kitchen ideas turn that instinct into a productive, joyful experience.
These setups encourage children to experiment with textures, role-play as chefs or bakers, and engage with the natural world.
Research highlights that outdoor play boosts mental health, strengthens immunity, and enhances problem-solving skills.
Diy mud kitchen ideas are also incredibly affordable, often costing less than $50 with recycled materials like old wood, tires, or thrift-store pots.
They’re perfect for containing messes outside, saving your floors from muddy footprints.
Whether you have a sprawling backyard or a tiny patio, there’s a mud kitchen design for you.
Ready to create a backyard haven for your kids?
Here are 13 unique ideas to inspire your next project.
1. Recycled Crate Kitchen

Transform wooden crates into a charming mud kitchen that’s both sturdy and stylish.
Stack two crates vertically to form a counter and add a third horizontally as a shelf.
Secure them with screws for safety.
Insert a metal tray as a sink for mixing mud pies.
Paint the crates with bright, nontoxic, weather-resistant paint—think sunny yellow or cheerful orange.
Attach hooks on the side for hanging spoons or whisks.
This compact design fits small yards and looks inviting for kids.
This setup is budget-friendly, with crates costing $5-$10 each at craft stores or flea markets.
The metal tray, around $3 at discount stores, is removable for easy cleaning.
Kids love the shelf for organizing cups and bowls, while the bright paint sparks excitement. Add a chalkboard sticker for writing “daily specials.”
Total cost is $20-$30, and assembly takes under an hour with basic tools.
It’s a perfect starter project for beginners.
To make it even more engaging, involve your kids in painting the crates, letting them choose colors or add handprints for a personal touch.
2. Suitcase Station

Turn an old suitcase into a portable, quirky with out diy mud kitchen ideas.
Open the suitcase to use the lid as a countertop and attach a small wooden shelf inside for storage.
Place a plastic bowl as a mixing sink.
Paint the suitcase exterior with fun patterns like red polka dots or blue stripes using weatherproof paint.
This design is ideal for small spaces like balconies or for families who travel, as it folds up neatly after play.
Repurposing a hard-shell suitcase from a thrift store ($5-$10) keeps costs low.
The plastic bowl, about $2, is easy to clean.
Line the interior with felt to secure tools like spoons, preventing rattles during transport.
Kids can close the suitcase after play, keeping everything tidy.
This unique design costs $15-$25 and requires minimal tools—just a screwdriver for the shelf.
It’s a standout option for renters or those with limited space.
For added fun, let kids decorate the suitcase with stickers, turning it into a personalized play station.
3. Tire and Board Combo

Create a low-to-the-ground mud kitchen using an old car tire as the base.
Lay a smooth wooden board on top for a counter and add a bucket as a sink.
Paint the tire with nontoxic black paint for a sleek, modern look.
This design is perfect for toddlers, as its low height makes it accessible for little hands.
Tires are often free from auto shops, and a scrap wood board costs $5-$10.
The bucket, around $3, doubles as a mixing station.
Sand the board to avoid splinters and add a chalkboard sticker for kids to scribble “recipes.”
This setup is durable, easy to hose down, and costs $10-$20.
Assembly is tool-free—just stack and paint.
It’s a practical choice for families seeking a quick, toddler-friendly build.
To enhance play, scatter small rocks or shells around the kitchen for kids to incorporate into their creations.
4. Window Frame Wonder
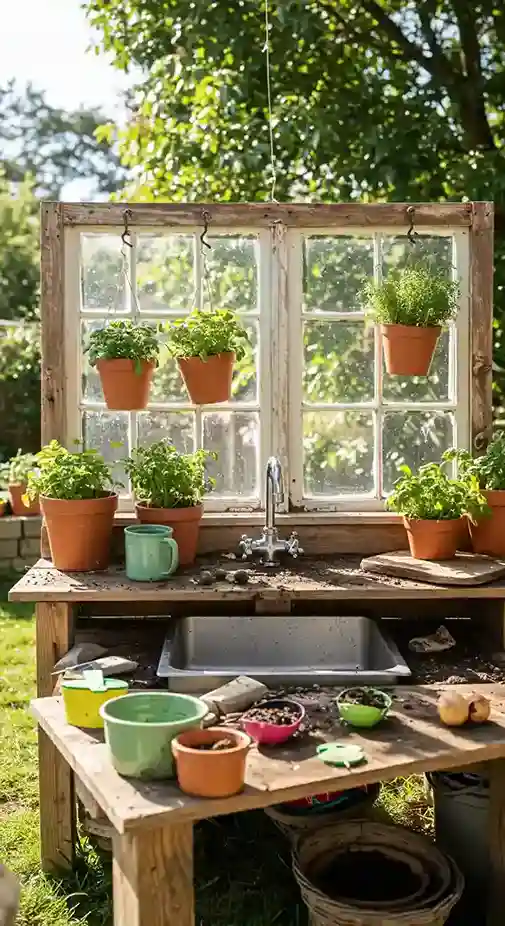
Add a touch of charm with an old window frame as a mud kitchen backdrop.
Attach the frame to a wooden counter made from sturdy planks.
Insert a metal basin as a sink for mixing.
Hang small pots with herbs like mint or basil for kids to incorporate into their “dishes.”
The window creates a pretend storefront vibe, perfect for imaginative play.
Window frames cost drugs, and planks are $10-$15 at hardware stores.
The metal basin, about $5, is durable and easy to clean.
This design takes a bit more effort—use a drill to secure the frame—but the result is stunning.
Kids love “serving” mud pies through the window.
Total cost is $25-$35, and it’s a great project for those wanting a decorative, garden-integrated kitchen.
For extra flair, hang a small curtain on the window frame to mimic a real shop.
5. Bookshelf Makeover
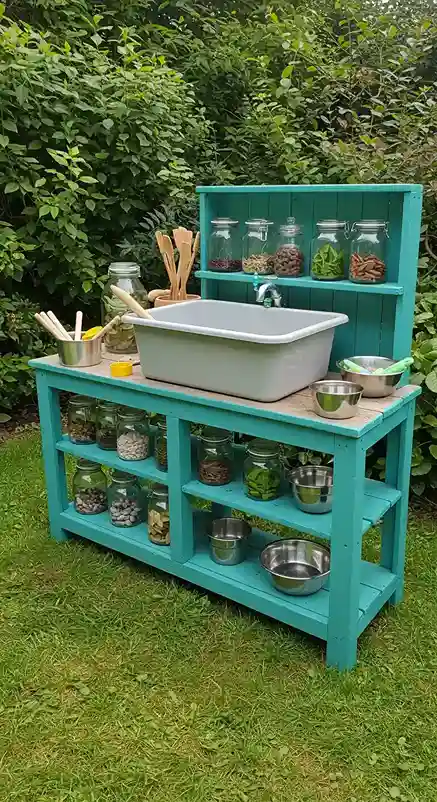
Repurpose an old bookshelf into a spacious with diy mud kitchen ideas.
Lay the bookshelf flat to create a counter and add a plastic tub as a sink.
Paint it with teal, weatherproof, nontoxic paint for a vibrant look.
Use the lower shelves for storing jars, cups, or mixing bowls.
This design suits older kids due to its taller height.
Bookshelves are often free or $10-$20 at thrift stores.
The plastic tub costs $3-$5.
Sand the bookshelf to ensure it’s splinter-free, and add hooks for hanging spatulas.
This setup offers ample space for multiple kids to play together.
Total cost is $20-$40, with assembly requiring a screwdriver and paintbrush.
It’s a versatile, durable option for busy households.
To personalize it, let kids paint designs like stars or flowers on the shelves.
6. Log Cabin Look
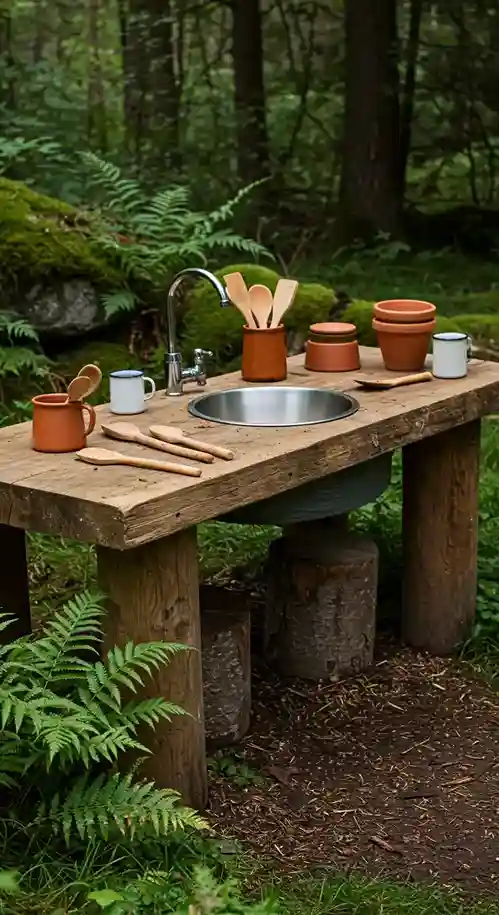
Build a rustic mud kitchen using logs for a natural, woodland feel. Use thick logs as legs and a flat log slab as a counter.
Add a stainless steel bowl as a sink.
Apply nontoxic varnish to protect against rain and splinters.
This design blends seamlessly with outdoor settings, encouraging kids to use natural items like sticks or leaves.
Logs can be sourced from fallen trees or lumber yards for $10-$20.
The steel bowl, about $5, is sturdy and easy to clean.
Varnish costs $5-$10 and ensures longevity.
This kitchen is unique, encouraging eco-friendly play, and costs $25-$35.
Assembly requires a saw and drill, but the result is a sturdy, nature-inspired station perfect for rural yards.
Add a basket of pinecones nearby to inspire creative “ingredients.”
7. Folding Table Hack
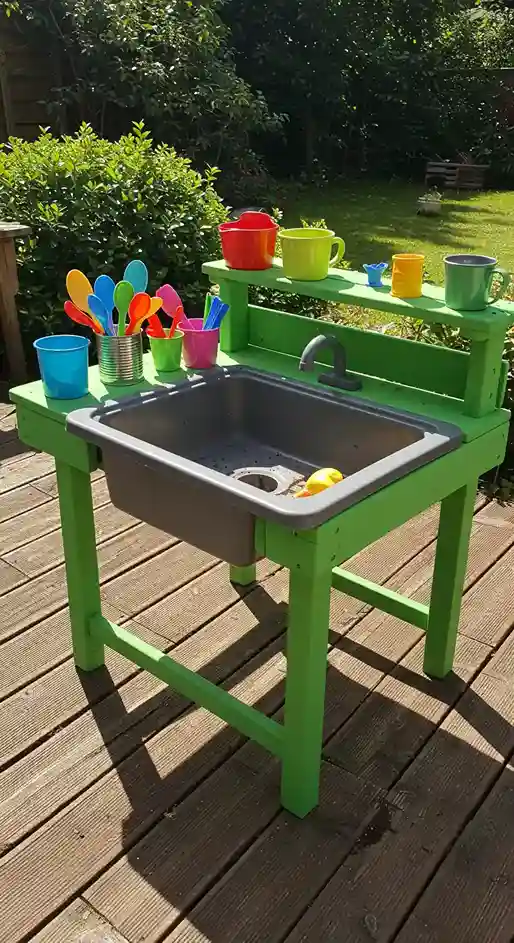
Convert a folding camping table into a lightweight mud kitchen.
Add a plastic tray as a sink and paint the table with green, nontoxic paint.
Attach a small shelf for storing cups or spoons.
This design is portable and easy to store, making it ideal for small spaces or seasonal use.
Folding tables cost $15-$25 secondhand.
The plastic tray, around $3, is removable for cleaning.
Add a vinyl sticker for kids to write “menu specials.”
This setup is quick to assemble—no tools needed beyond a paintbrush—and costs $25-$35.
Kids love the sturdy surface, and parents appreciate the foldable design for easy storage.
For added fun, attach a small bell for kids to ring when their “dishes” are ready.
8. Barrel Base Beauty

Use a wooden barrel cut in half as a quirky base for your mud kitchen. Top it with a wooden plank for a counter and add a metal bucket as a sink.
Paint the barrel with blue, weatherproof paint for a nautical vibe.
This design is eye-catching and durable, perfect for coastal or themed yards.
Barrels cost $10-$20 at farm stores, and a plank is $5-$10.
The metal bucket, about $4, is easy to clean.
Kids can decorate with seashells or pebbles for extra flair.
This setup requires a saw to cut the barrel but is otherwise simple, costing $25-$40.
It’s a standout choice for families wanting a unique, themed kitchen.
Add a small anchor sticker for a playful nautical touch.
9. Step Stool Setup
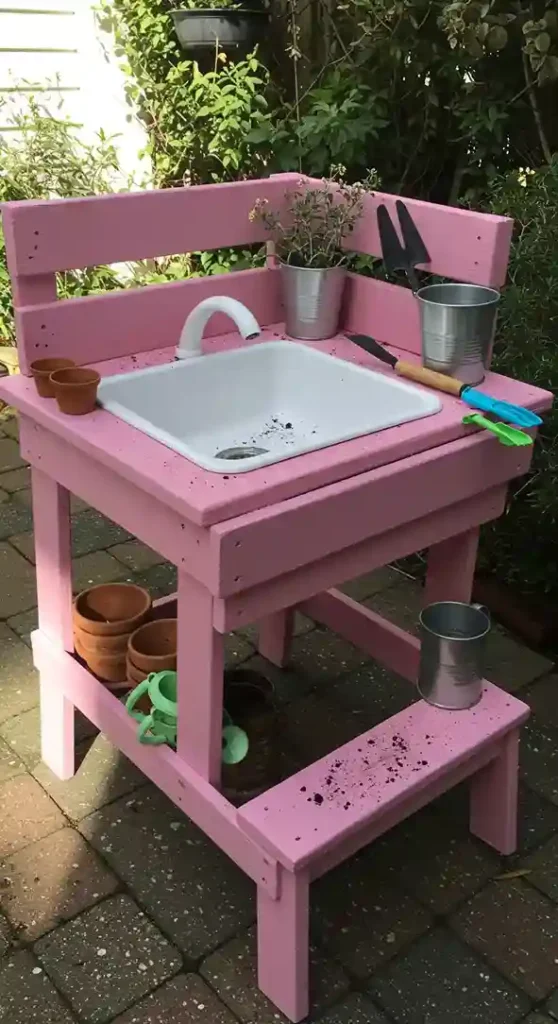
Turn a wooden step stool into a compact mud kitchen for tiny spaces.
Use the top step as a counter and the lower step for storage.
Add a plastic bowl as a sink and paint the stool with pink, nontoxic paint.
This design is perfect for toddlers due to its small size and low height.
Step stools cost $10-$20 at thrift shops.
The plastic bowl is $2-$3.
Add stickers for kids to personalize the stool, making it feel like their own.
This budget-friendly option costs $15-$25 and requires no tools beyond a paintbrush.
It’s an easy, adorable choice for apartments or small patios.
For extra engagement, provide a small basket of colorful beads for kids to mix into their mud creations.
10. Picnic Table Play

Repurpose a kids’ picnic table into a social mud kitchen.
Use one side of the table as a counter and add a metal tray as a sink.
Paint it with red, nontoxic paint for a bold look. The benches serve as prep areas, making it ideal for group play.
Picnic tables cost $20-$40 used. The metal tray is $3-$5.
Add a chalkboard for kids to write “orders,” encouraging teamwork.
This sturdy design costs $30-$50 and requires minimal tools.
It’s perfect for families with multiple kids or playdates, offering plenty of space for collaborative fun.
To boost interaction, include a set of plastic plates for kids to “serve” their creations.
11. Cable Spool Creation
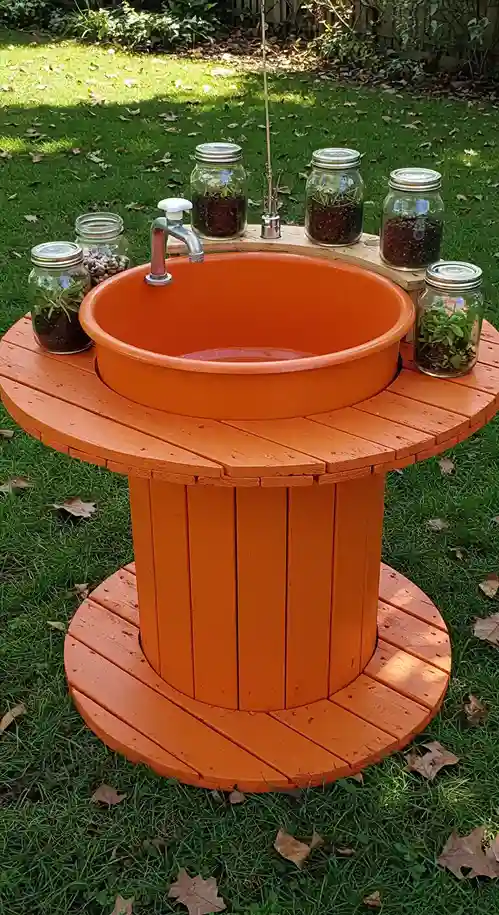
Use a wooden cable spool as a round mud kitchen.
Lay it flat and add a plastic tub as a sink.
Paint it with orange, weatherproof paint for a playful look.
Attach a lazy Susan for spinning storage, holding jars or spoons.
This design is unique and kid-friendly with no sharp edges.
Cable spools are often free at construction sites.
The plastic tub costs $3-$5, and a lazy Susan is $5-$10.
This setup is simple to assemble and costs $20-$30.
Kids love spinning the storage for easy access, making it a fun, interactive choice for any yard.
12. Planter Box Play

Convert a long planter box into a garden-friendly mud kitchen. Use the box as a counter and add a stainless steel bowl as a sink.
Paint it with purple, nontoxic paint for a vibrant touch.
Attach a trellis for hanging tools like spoons or small buckets.
This design integrates with plants, encouraging kids to use petals or herbs.
Planter boxes cost $15-$25 at garden stores.
The steel bowl is $5, and a trellis is $5-$10.
This setup costs $25-$40 and is easy to assemble with a drill.
Kids love the garden connection, making it ideal for families who enjoy planting.
It’s both practical and pretty.
13. Sawhorse Support

Build a mud kitchen with sawhorses as the base for a clean, adjustable design. Top with a wooden plank for a counter and add a plastic bucket as a sink.
Paint the sawhorses with navy, nontoxic paint for a modern look.
This setup is sturdy and can be adjusted for growing kids.
Sawhorses cost $15-$25 at hardware stores, and a plank is $5-$10.
The plastic bucket is $3-$5.
This design is easy to assemble with a screwdriver and costs $25-$35.
Its adjustable height makes it versatile, perfect for families wanting a long-lasting kitchen.
Tips for Building a Mud Kitchen
- Save Money: Hunt for free or cheap materials at thrift stores, salvage yards, or construction sites. Old pots and bowls add character.
- Stay Safe: Sand rough edges and use nontoxic paint or varnish. Check screws regularly to ensure stability.
- Choose the Right Spot: Place the kitchen in a flat, shaded area near dirt or a water source for easy access.
- Add Fun Extras: Include spoons, muffin tins, or natural items like pinecones, leaves, or stones for varied play.
- Keep It Clean: Set boundaries to confine mud to the kitchen. A nearby hose makes cleanup a breeze.
Why Every Backyard Should Have a Mud Kitchen
A mud kitchen isn’t just a fun play area — it offers real developmental benefits for children. Here’s why it’s a must-have for any family backyard:
- Boosts Creativity: Children engage in imaginative play, pretending to be chefs, bakers, or scientists as they mix mud, water, and natural ingredients.
- Supports Sensory Development: The combination of textures, smells, and sounds stimulates multiple senses, helping brain development.
- Encourages Outdoor Play: In a digital world, mud kitchens offer a compelling reason for kids to spend more time outdoors.
- Promotes Teamwork: Playing together teaches kids cooperation, turn-taking, and communication skills.
- Budget-Friendly Entertainment: Most mud kitchens can be built with recycled materials, making them a cost-effective play solution.
Step-by-Step DIY Mud Kitchen Build Guide
Step 1: Choose the Right Location
- Look for a flat, shaded area in your backyard.
- Ideally, place it near a water source (hose or rain barrel).
- Make sure it’s on soil or grass where messes are easy to wash away.
Step 2: Gather Your Materials
(see complete list below!)
Step 3: Build the Frame
- If using crates, pallets, or an old bookshelf, start by stacking and securing them with screws or brackets.
- For freestanding counters, attach wooden planks to sturdy legs or sawhorses.
- Make sure everything is level and stable.
Step 4: Install the Sink
- Place a metal bowl, plastic tub, or basin into a cutout on the counter.
- For drainage, simply lift the bowl to empty it after play.
Step 5: Add Storage and Accessories
- Attach hooks for hanging utensils.
- Add shelves or baskets for bowls, cups, and natural “ingredients.”
- Use a chalkboard or whiteboard for kids to write their “menu.”
Step 6: Paint and Personalize
- Use child-safe, weatherproof, non-toxic paint.
- Let your kids help decorate with handprints, stencils, or stickers!
Step 7: Final Safety Check
- Sand all rough edges.
- Double-check all screws, brackets, and fastenings.
- Ensure stability before play.
Complete Materials & Tools List
Basic Materials:
- Recycled wood: pallets, crates, bookshelves, or planks
- Sink: old metal bowl, plastic tub, or basin
- Screws and brackets for stability
- Weatherproof, non-toxic paint
- Hooks for utensils
- Storage baskets or small shelves
Optional Fun Extras:
- Chalkboard panel or stickers
- Small curtain for “window” designs
- Herb plants for pretend cooking
Tools Needed:
- Screwdriver or drill
- Sandpaper or electric sander
- Hand saw (if cutting planks or barrels)
- Paintbrushes
Essential Safety Tips for Mud Kitchens
- Smooth Surfaces: Always sand wood thoroughly to prevent splinters.
- Secure Build: Make sure all structures are stable, especially if toddlers will be playing.
- Non-Toxic Materials: Use paints, sealants, and finishes labeled child-safe.
- Supervise Younger Kids: Always supervise small children during play, especially around water.
- Weather Protection: Use waterproof materials or cover your mud kitchen when not in use to prolong durability.
- Hygiene: Keep a hand-washing station nearby and teach kids to wash hands after play.
Conclusion
Mud kitchens are a brilliant way to ignite kids’ creativity, encourage outdoor play, and create lasting memories.
These 13 DIY ideas—from recycled crates to sawhorse setups—offer diverse, budget-friendly designs for every home.
Each project is simple, safe, and packed with opportunities for imaginative fun.
Compared to other guides, this article provides more detailed instructions, unique concepts, and vivid visualizations to inspire your build.
Whether you’re working with a tiny patio or a sprawling yard, there’s a mud kitchen here for you.
Grab some old materials, involve your kids in the process, and build a backyard haven they’ll love.
Start today and watch the muddy magic unfold!
FAQs
What is a mud kitchen?
It’s an outdoor play area where kids mix dirt, water, and natural items to make pretend food. It’s messy and super fun!
How much does it cost to build one?
Most designs cost $15-$50 using recycled materials. More elaborate setups might reach $75.
What materials do I need?
You’ll need wood (crates, planks, or logs), screws, a drill, and old kitchen items like bowls or buckets. Paint is optional but fun.
Are mud kitchens safe for kids?
Yes, if you smooth edges and use kid-safe paint. Supervise younger children to ensure safe play.
How do I control the mess?
Keep the kitchen outside and use a hose for cleanup. Set clear rules to contain the dirt.
Can I build a mud kitchen without tools?
Absolutely! Designs like the tire or crate kitchens require no tools—just stack and paint.